Ublox Tab
Introduce
This function allows users to configure Ublox module in the same way as Ublox Center software. Just connect the UART1 port (ESPrtk) to the UART-Configure (Ublox module), select the appropriate baudrate and start the configuration.
This article shows you how to use ESPrtk to configure Ublox's F9P / M8P module in BaseStation mode (export RTCM data to TX1 port).
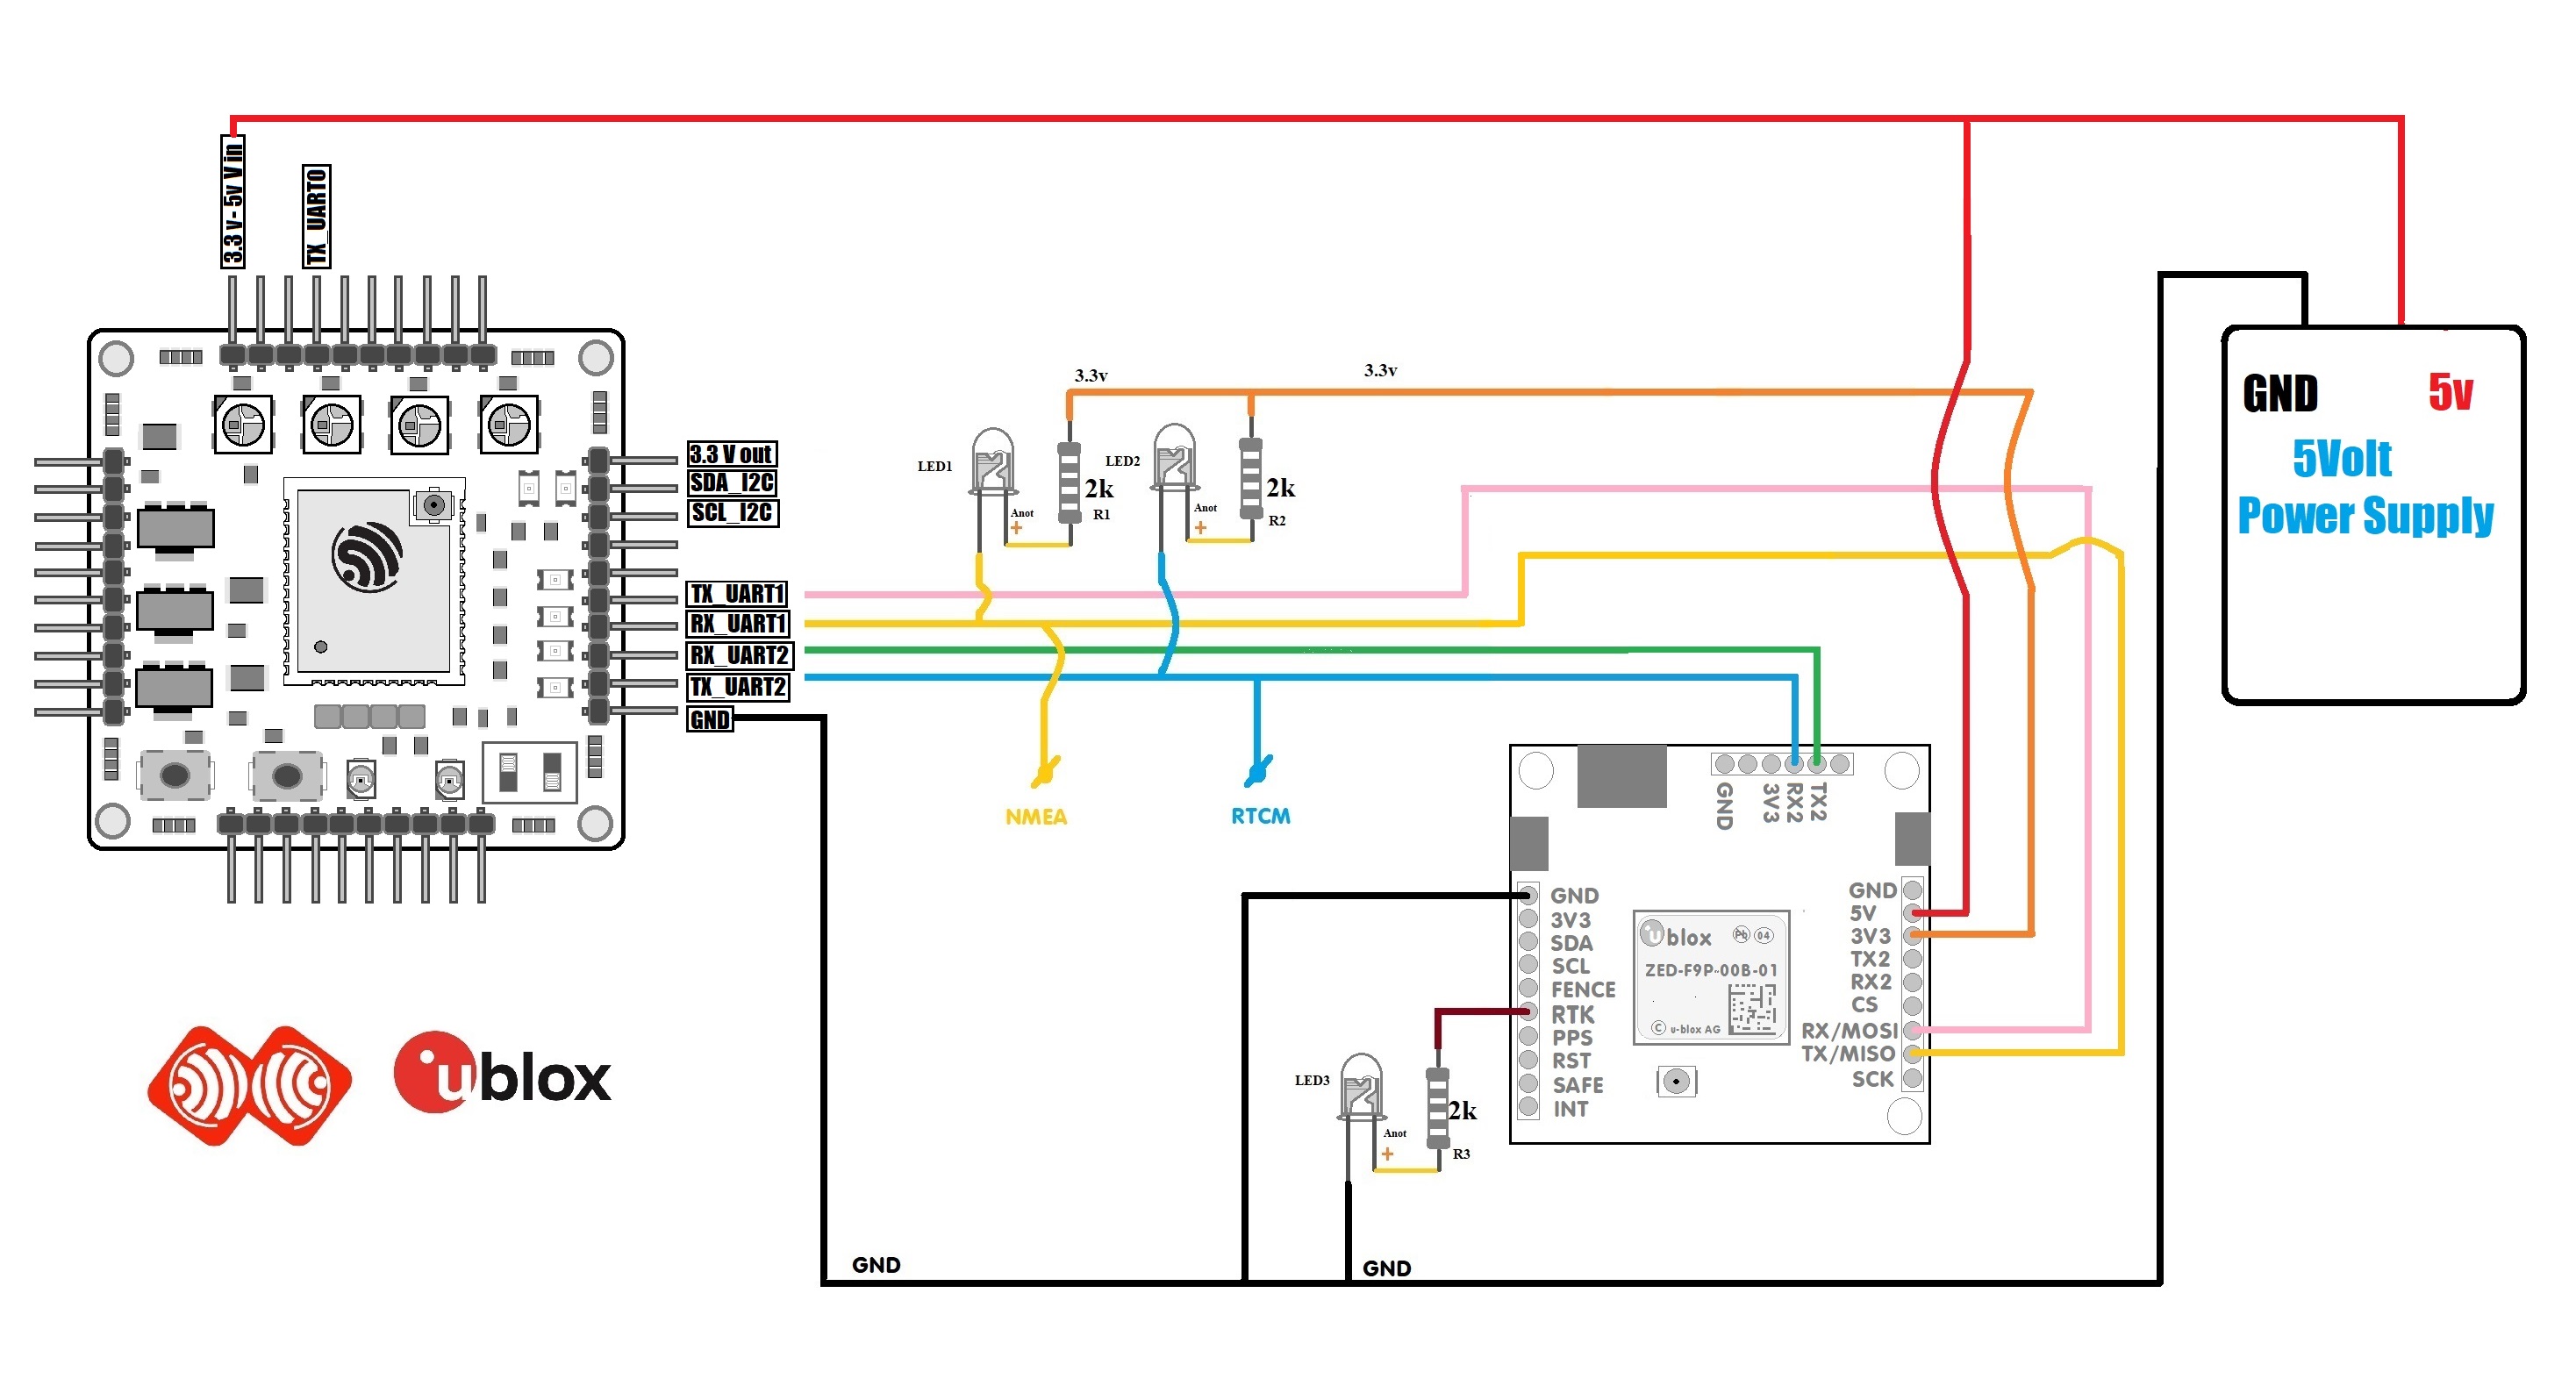
Hardware connect
| ESPrtk | ZED-F9P | M8P - LEA -NEO | Other |
|---|---|---|---|
| TX-UART1 | RX1 | RX1 | RX-UART Conigure |
| RX-UART1 | TX1 | TX1 | TX-UART Conigure |
| TX-UART2 | RX2 | RX2 | RX-UART Conigure |
| RX-UART2 | TX2 | TX2 | TX-UART Conigure |

After connecting the ESPrtk to the Ublox module, start ESPrtk in "WEB Configure" mode, access the "Ublox" tab and start communicating with the Ublox module with the baudrate and port. (See more Tab Ublox Configure ).
In this menu, scroll down on the left panel to find the MSG (Messages) menu. There, open the slide down menu and pick the RTCM1005 messages. After that, check both UART1 and USB checkboxes and click on the Send button. ( Checking both UART1 and USB checkboxes will allow the chip to send the messages either from USB or UART1, depending on your system setup. ) After any modification made in the Configuration panel, always remember to hit the Send button at the bottom of the configuration view panel, or your modifications won't be stored!

You must repeat these steps for the RTCM1077, RTCM1087 and RTCM1127 messages (respectively GPS, GLONASS and BEIDOU raw data) without omitting to hit the Send button each time, or your changes won't be applied.


Next, move to the TMODE3 (Time Mode 3) section on the left panel. You will be able in this section to chose whether you'll use Survey-in (if you don't have an exactly known position for your base) or Fixed (if you know the exact position of your base, either in ECEF or Lat/Lon/Alt format) mode.
In Fixed mode, the surveying is not done, and you have to enter the position of the base yourself, whether it be in ECEF or Lat/Lon/Alt format.

In Survey-in mode, your base will determine its position by itself. You will have to set a minimum surveying time and a minimum accuracy. The surveying will last at least for the duration you set, and won't stop until it has reached the accuracy you selected. Don't forget to click the Send button after setting up the surveying.

You have to encapsulate raw data in your telemetry link then. This will only require you to have your base and control station (computer) connected through USB. To set this up, you will first need to save the whole configuration you've done, by getting into the CFG (Configuration) menu on the left panel, selecting all four memories on the right, and clicking Send.
